At the age of 7 I was introduced to Java using Eclipse through my father — the programming field has held my interest ever since. Having become an avid game player and developer, it’s become paramount to me to provide the support and skills needed to develop games I can be proud of. Ultimately, game programming was the most direct way to mix my passion for gaming and programming together to create unbelievable worlds.
Within gaming and programming, the role of support has always been a forte. In the end though the goal is to reach a position that allows the opportunity to lead and manage a team of my own. My current skillset includes C++, C#, Python, Godot, Unity Engine and Unreal Engine 5 which have allowed me to begin developing my own game concepts.
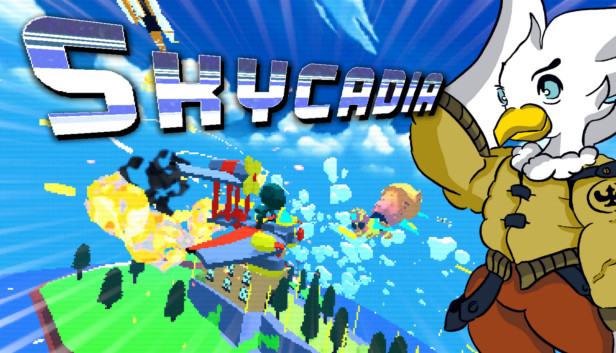
Skycadia is a retro arcade dogfighter released on Xbox, Switch, and Steam. As a Unity developer for Skycadia I created development tools using C# and Rider/Visual Studio 2022 primarily focused on the creation of systems supporting weapons, ships, and dialogue in the project.
This tool uses Prefabs and ScritableObjects to easily create Lore points that supply information and dialogue to the player.
Creating this small tool improved the speed of the creation process immensely, creating a ship was just a few clicks.
Setup the project with git.
Taught team members how to add , commit, push, fetch, create branch, and merge changes.
This tool makes creating what we call Lore Points easier to insert into levels. The examples below show how I created the LorePoint script which allows the current dialgue system to be modular and used anywhere.

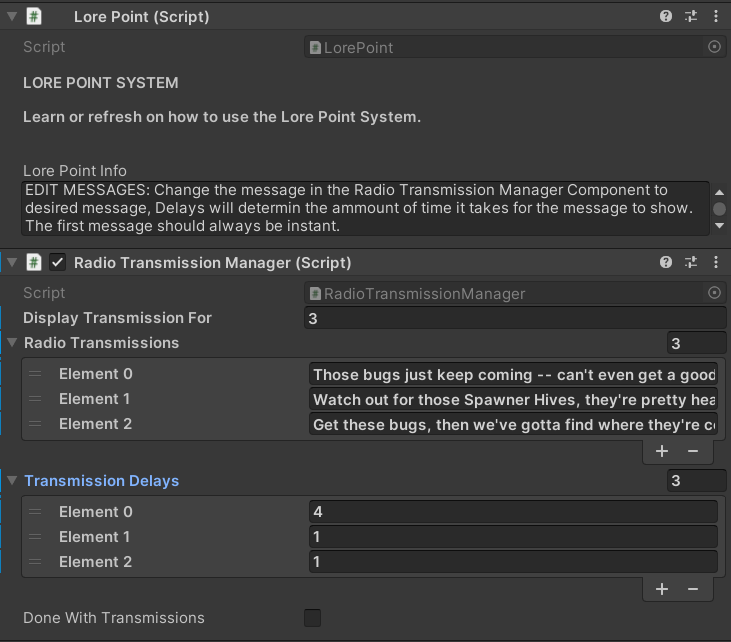
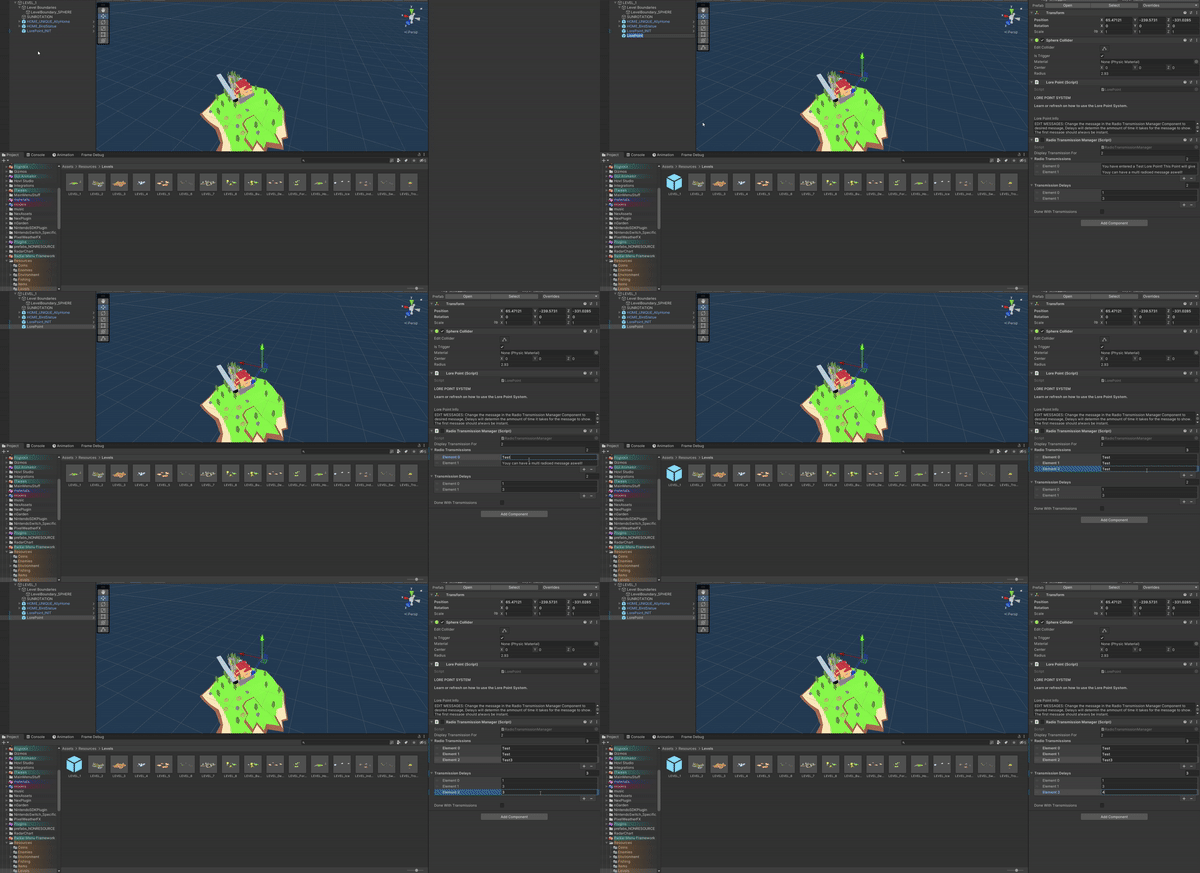
This is the script that made the entire system modular. Instead of creating a single Lore point that couldn't be reused (as it was only activated when you spawn), this takes a more modular approach where the user will spawn a module/GameObject which has its own data. That data is read from this script effectively making this script the core of my system.
private void OnTriggerEnter(Collider other)
{
    if (other.gameObject.CompareTag("TargetableEntity"))
    {
        RadioTransmissionManager radioLore = GetComponent();
        SFGameManager.instance.radioTransmissionManager = radioLore;
        radioLore.enabled = true;
    }
}
The snippet below will allow the object to be spawned from a menu item where the camera is currently looking. So instead of creating a GameObject and filling that object with the components it needs, it can be spawned from a preconfigured menu.
private void OnTriggerEnter(Collider other)
                                        [MenuItem("Skycadia/Create LorePoint")]
public static void CreateLorePoint(MenuCommand menuCommand)
{
    CreatePrefab("LorePoint");
}

[MenuItem("GameObject/Create LorePoint", false, 0)]
public static void CreateLorePointCtxMenu()
{
    CreatePrefab("LorePoint");
}

public static void CreatePrefab(string path)
{
    GameObject loreObject = PrefabUtility.InstantiatePrefab(Resources.Load(path)) as GameObject;
    Place(loreObject);
}

public static void Place(GameObject gameObject)
{
    // Find location
    SceneView lastView = SceneView.lastActiveSceneView;
    gameObject.transform.position = lastView ? lastView.pivot : Vector3.zero;

    // Make sure we place the object in the proper scene, with a relevant name
    StageUtility.PlaceGameObjectInCurrentStage(gameObject);
    GameObjectUtility.EnsureUniqueNameForSibling(gameObject);

    // Record undo, and select
    Undo.RegisterCreatedObjectUndo(gameObject, $"Create Object: {gameObject.name}");
    Selection.activeGameObject = gameObject;

    // For prefabs, let's mark the scene as dirty for saving
    EditorSceneManager.MarkSceneDirty(EditorSceneManager.GetActiveScene());
}

void OnDrawGizmosSelected()
{
    // Draw a yellow sphere at the transform's position
    Gizmos.color = new Color(.5f, .5f, 1f, .5f);
    Gizmos.DrawSphere(transform.position, GetComponent().radius * transform.localScale.x);
}
I developed this system to allow designers to create and modify pilots and ships easily. The pilot and ships system was originally hard-coded but due to the inexperience of team I had to create a more efficient method.
The system is based on Scriptable Objects. Scriptable Objects are cross-scene data sets used for storing data and creating a simple way to edit the data instead of hard-coding it.
The screenshots below are examples of my designer‐friendly system. It allows non‐programmers to iterate faster. If a designer or artist needs to make a change they have a quick and easy way to do so.
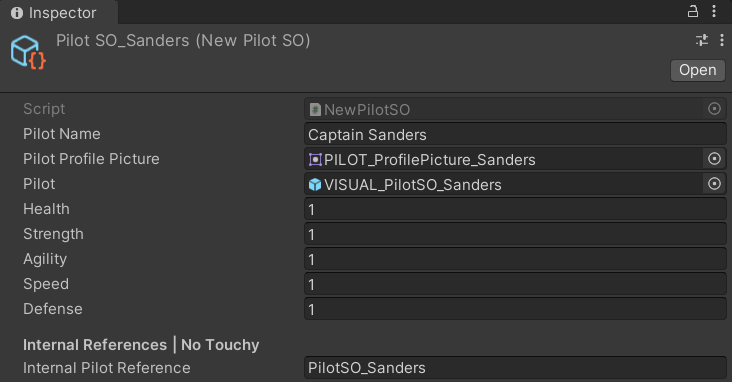
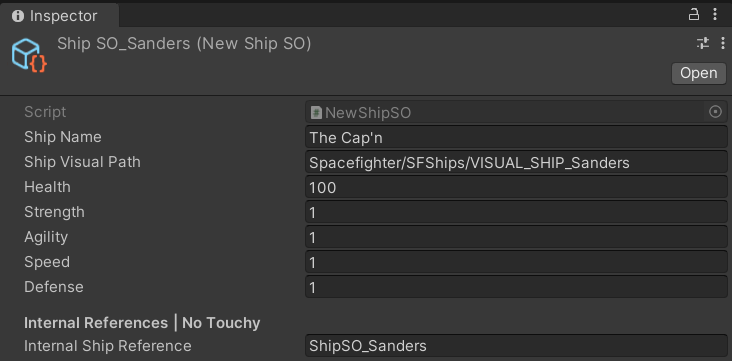
The orignal system contained hard-coded values that had to be changed from within the scripts.
The snippet below creates a new attribute much like any other attribute that already exists and looks like [newAttribute]. This attribute acts like a conditional operator which will hide or show something depending on a boolean.
    // Determine whether this field should be visible.
// (We could probably do some caching here...)
bool ShouldShow(SerializedProperty property) {
    var conditionAttribute = (ConditionalPropertyAttribute)attribute;
    string conditionPath = conditionAttribute.condition;

    // If this property is defined inside a nested type
    // (like a struct inside a MonoBehaviour), look for
    // our condition field inside the same nested instance.
    string thisPropertyPath = property.propertyPath;
    int last = thisPropertyPath.LastIndexOf('.');
    if (last > 0) {
        string containerPath = thisPropertyPath.Substring(0, last + 1);
        conditionPath = containerPath + conditionPath;
    }

    // Get the SerializedProperty representing the field that is our criterion.
    var conditionProperty = property.serializedObject.FindProperty(conditionPath);

    // For now, we'll only support bool criteria, and default to visible if there's a problem.
    if (conditionProperty == null || conditionProperty.type != "bool")
        return true;

    // Use the condition property's boolean value to drive visibility.
    return conditionProperty.boolValue;
}

public override void OnGUI(Rect position, SerializedProperty property, GUIContent label) {
    if(ShouldShow(property))
        EditorGUI.PropertyField(position, property, label, true);
}

public override float GetPropertyHeight(SerializedProperty property, GUIContent label) {
    if (ShouldShow(property)) {
        // Provision the normal vertical spacing for this control.
        return EditorGUI.GetPropertyHeight(property, label, true);
    } else {
        // Collapse the unseen derived property.
        return -EditorGUIUtility.standardVerticalSpacing;
    }
}
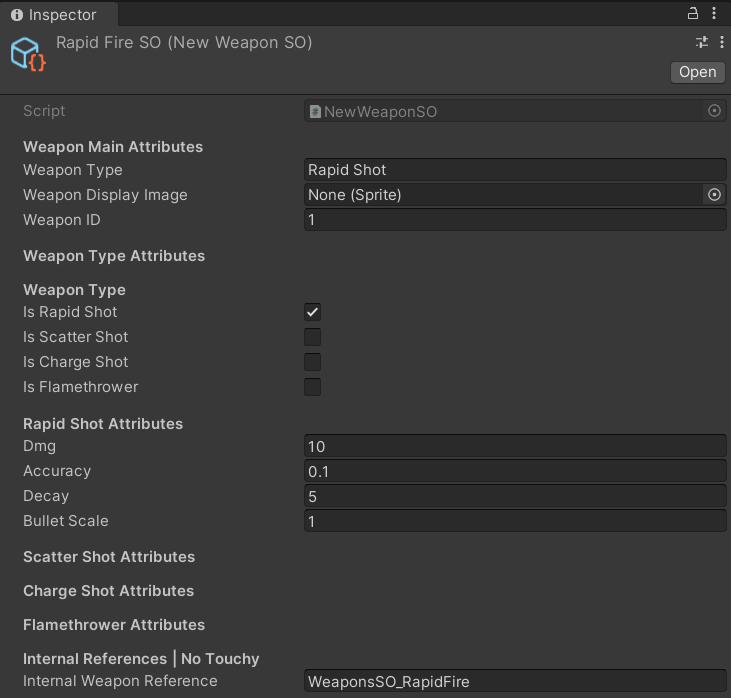
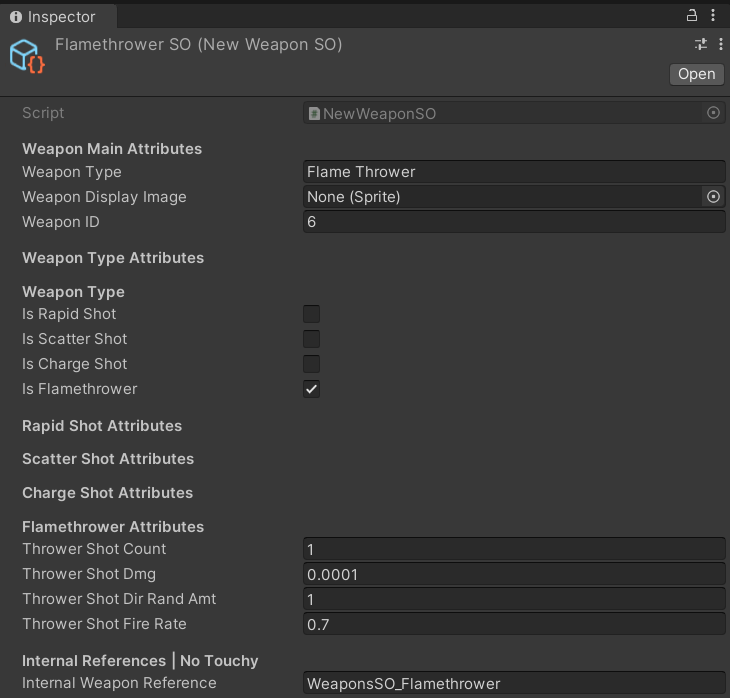
This code snippet is an example of my ConditionalProperty attribute in use. It checks for a boolean value and according to that boolean state the inspector will dynamically change to match your selection. This way unnecessary values are hidden making it easier to read at a glance.
[Header("Weapon Type Attributes")]

[Header("Weapon Type")]
[Tooltip(
    "Enable one of these to define the type and to enable to attributes for that type of weapon. | CHOOSE ONE")]
public bool isRapidShot;
public bool isScatterShot;
public bool isChargeShot;
//public bool isMissile;
public bool isFlamethrower;

[Header("Rapid Shot Attributes")]
[ConditionalProperty("isRapidShot")]
public float dmg;
[ConditionalProperty("isRapidShot")]
public float accuracy;
[ConditionalProperty("isRapidShot")]
public float decay;
[ConditionalProperty("isRapidShot")]
public float bulletScale = 1f;

[Header("Scatter Shot Attributes")]
[ConditionalProperty("isScatterShot")]
public float buckShotCount;
[ConditionalProperty("isScatterShot")]
public float buckShotDmg;
[ConditionalProperty("isScatterShot")]
public float buckShotDirRandAmt;
[ConditionalProperty("isScatterShot")]
public float buckShotFireRate;

[Header("Charge Shot Attributes")]
[ConditionalProperty("isChargeShot")]
public float chargeShotDmg;
[ConditionalProperty("isChargeShot")]
public float chargeShotAccuracy;
[ConditionalProperty("isChargeShot")]
public float chargeShotDecay;
[ConditionalProperty("isChargeShot")]
public float chargeShotFireRate;

[Header("Flamethrower Attributes")]
[ConditionalProperty("isFlamethrower")]
public float throwerShotCount;
[ConditionalProperty("isFlamethrower")]
public float throwerShotDmg;
[ConditionalProperty("isFlamethrower")]
public float throwerShotDirRandAmt;
[ConditionalProperty("isFlamethrower")]
public float throwerShotFireRate;
These two screen shots below take the conditional operator and display the weapons stats. If you were to select a certain type of shot style you would get separate settings to modify and set up.
In conclusion I created tools to better the efficiency of the team.
Currently a very early work in progress for Studio Nisse, working with the same multidisceplinary team of Skycadia.
So far in this development I have done of research into open world development, and the addressables system unity created.
Our game has animals you can ride on and modify the scale, using an asset to do the heavy work for us it requires some setup, I am creating this tool to take the initial setup and just spit out the result..
Setup the project with git.
Taught team members how to commit, push, fetch, create and branch, and merge changes.
The Animal Creation Tool is currently unfinished at this time but the tool is to dramatically reduce time spent on setting up the animal characters for the game.
Features and Benifits
These three points are key to the reason why this tool is so critical, the tool will allow us to create animals with customized settings and attributes faster and simpler, as the current proccess is time consuming and overcombant. The creation of each animal will be automatic, you feed the values and mesh into the tool and the tool will create and populate everything nassary for that animal to work only then will you need to go in and edit the finishing touches. Since the animal is created with attributes already setup, changing them will be a hassle, so I came up with a hassle free solution, reimport the created animal and select the setting desired, once agian it will ouput your edited animal and you are off to the races!
Unfortunatly this tool is very early in development. So all I have is a flowchart to show my thought proccess.Below is a flowchart for the tool.
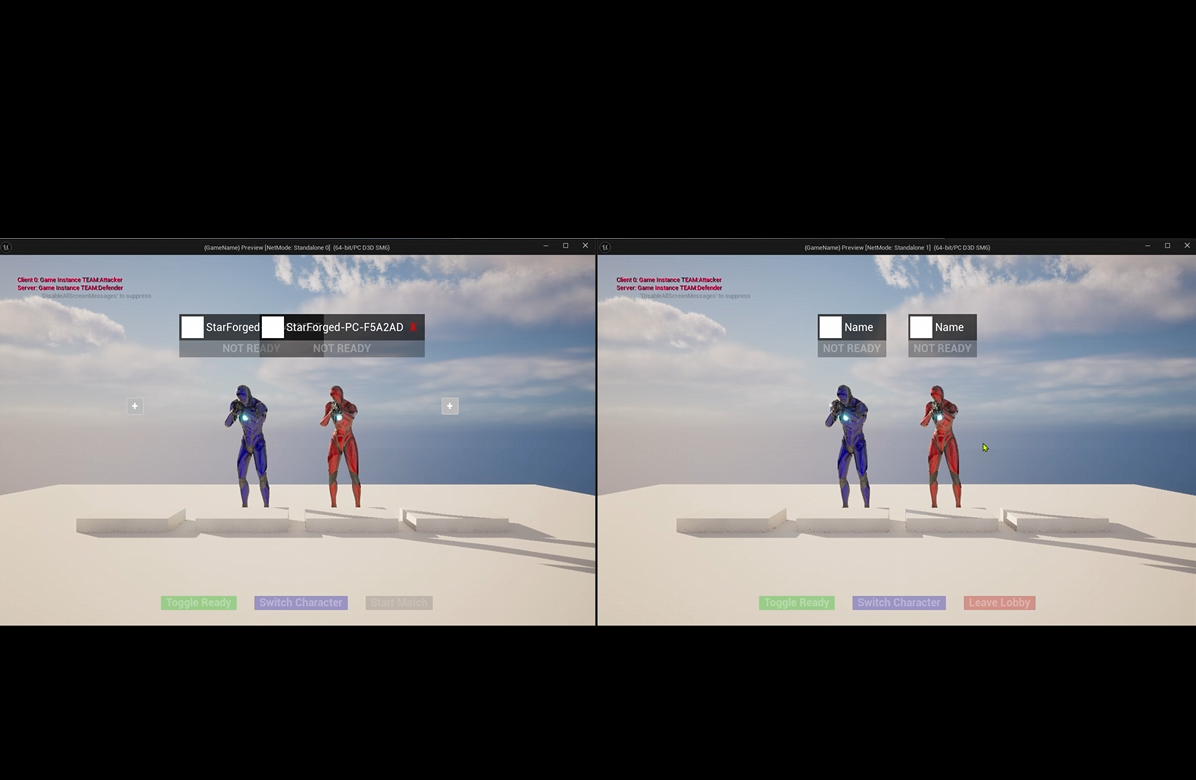
CRTL + Mouse wheel to zoom in and out.Multiplayer FPS Prototype; two clients are able to connect and play via Steam. features include P2P Connection, host to client simulation, and a lobby finder.
Each user can create a lobby and another can join that said lobby.
Players can get invites, or join off of their friends to easily connect, and enjoy. (Side note: this also allows for Steams Nat Punchthrough which allows connection without portforwarding.
Keep all players in sync of movement, and allow the server to dictate what goes and what doesn't.
Lobby and client connections were accomplished using Netcode for GameObjects with Facepunch Steamworks. The issues I had were to get the data from the Steam API to interface properly with the Unity objects.
The code snippet below displays how I displayed Lobbies that were created.
I created a filter of isTesting as I was using the test AppID Steam provides. This way I could filter my lobbies out from others. I created a for loop to iterate through each lobby and display each that has that filter attached, thus using Unity's UI ToolKit to display in a list-view each item that it has grabbed, giving the list the data it needs to present.
Asterisks surrounding words such as Button or Label interfered with the HTML and code presentation
if (SteamManager.Instance.lobbiesList != null)
{

    //Create a list of data. In this case, numbers from 1 to 1000.
    foreach (Lobby lobby in SteamManager.Instance.lobbiesList.ToList())
    {

        SteamManager.Instance.activeLobbies.Add(lobby);
        Debug.Log(SteamManager.Instance.activeLobbies.Count);

    }

    int i = 0;

    int itemCount = SteamManager.Instance.activeLobbies.Count;
    var items = new List>(itemCount);
    for (i = 0; i < itemCount; i++)
    {
        items.Add(Tuple.Create(SteamManager.Instance.activeLobbies[i].GetData("lobbyName"), SteamManager.Instance.activeLobbies[i].Id, SteamManager.Instance.activeLobbies[i].MemberCount, SteamManager.Instance.activeLobbies[i].MaxMembers));
        Debug.Log(items[i].Item1);
        //Debug.Log(activeLobbies[i]);
    }

    // The "makeItem" function is called when the
    // ListView needs more items to render.
    Func makeItem = () =>
    {
        var root = new VisualElement();
        var label = new Label();
        root.Add(label);
        return root;
    };

    // As the user scrolls through the list, the ListView object
    // recycles elements created by the "makeItem" function,
    // and invoke the "bindItem" callback to associate
    // the element with the matching data item (specified as an index in the list).
    Action bindItem = (e, i) =>
    {
        var label = e.Q<*Label*>();
        label.text = items[i].Item1 + " | Members: " + items[i].Item3 + "/" + items[i].Item4;
    };

    // Provide the list view with an explict height for every row
    // so it can calculate how many items to actually display
    const int itemHeight = 64;

    var listView = new ListView(items, itemHeight, makeItem, bindItem);

    listView.onItemsChosen += objects => SteamManager.Instance.JoinLobby(items[listView.selectedIndex].Item2);
    //SteamManager.Instance.currLobby = items[listView.selectedIndex].Item2;
    //listView.onSelectionChange += objects => Debug.Log(items[listView.selectedIndex].ToString());

    // List Style
    listView.showAlternatingRowBackgrounds = AlternatingRowBackground.All;
    listView.selectionType = SelectionType.Single;
    listView.style.flexGrow = 1.0f;
    listView.style.fontSize = 48f;
    listView.style.justifyContent = Justify.Center;
    listView.showBoundCollectionSize = true;

    body.Add(listView);
}
Server Prediction and Client Reconciliation were my two primary problems that I had to solve.
The code below checks if the player is not equal to the server position then the server will correct the player by setting the client's transform to that of the server's transform.
void OnServerStateChanged(TransformState previousState, TransformState serverState) {
if (!IsLocalPlayer) return;

if (_previousTransformState == null) {
    _previousTransformState = serverState;
}

TransformState calculatedState = _transformStates.First(localState => localState.Tick == serverState.Tick);

if (calculatedState.Position != serverState.Position) {
    Debug.Log("CORRECTING CLIENT POS!");

    //Teleport the player to server pos.
    TeleportPlayer(serverState);

    //Replay the inputs that happened after. | Change to for loop if needed. (Not optimised as is.
    IEnumerable inputs = _inputStates.Where(input => input.Tick > serverState.Tick);

    // Lazy way of sorting, algorithm would be better.
    inputs = from input in inputs orderby input.Tick select input;

        foreach (InputState inputState in inputs) {
            MovePlayer(inputState.movementInput);
            RotatePlayer(inputState.lookInput);

            TransformState newTranformState = new TransformState()
            {
                Tick = inputState.Tick,
                Position = transform.position,
                Rotation = transform.rotation,
                HasStartedMoving = true

            };

            // Could be written better once I understand how to write it better.
            for (int i = 0; i < _transformStates.Length; i++)
            {
                if (_transformStates[i].Tick == inputState.Tick)
                {
                    _transformStates[i] = newTranformState;
                    break;
                }
            }
        }
    }
}

private void TeleportPlayer(TransformState state)
{
    _controller.enabled = false;
    transform.position = state.Position;
    transform.rotation = state.Rotation;
    _controller.enabled = true;

    for (int i = 0; i < _transformStates.Length; i++)
    {
        if (_transformStates[i].Tick == state.Tick)
        {
            _transformStates[i] = state;
            break;
        }
    }
}
This section may seem underdeveloped, but it is just a page of my projects and accomplishments I have made with Unreal Engine 5. Some of these projects use Blueprints, whilst others use Blueprints and C++.
Battery Collector is a project I made using a tutorial, utilizing C++ and Blueprints. I built upon the character class to allow interaction between pickupable objects as well as instantiating effects.
Created using the Wukong Paragon model, free on the Unreal Marketplace, and linking the abilities and effects using C++ and Blueprints, I set up the main logic and backend in C++ and created extentions to Blueprints for easy access to change and modify. This was the first ever project I had worked on in Unreal Engine, and the result is pretty clean!
Shaders were created in the Unreal Shader Graph. I set up a pixelated shader, toon/cel shader, and used my cel shader and adapted it to metallic objects. I learned how shaders interact and work within the Engine. Although not very experienced with shaders, I have a very nice result that I am happy with.
